As an Amazon Associate, we earn from qualifying purchases. Some links on this site are affiliate links at no extra cost to you. Our recommendations are based on thorough research and editorial judgment.
How To Repot Indoor Plants?
To repot indoor plants, we first gather our supplies: a new pot, potting mix, pruning shears, and gloves. Next, we remove the plant by loosening the soil and gently tapping the pot. After evaluating the roots, we prune any damaged ones. We then fill the new pot with a suitable potting mix, place the plant inside, and water it appropriately. Finally, we’ll care for the plant in indirect light, ensuring it acclimates well. By following these steps, we can support plant growth effectively.
Key Takeaways
- Gather supplies: new pot (1-2 inches wider), high-quality potting mix, pruning shears, and gloves before starting the repotting process.
- Gently remove the plant from its current pot, loosening the soil and massaging the sides if rootbound.
- Assess and prune damaged roots, ensuring not to remove more than one-third of the root mass to minimize stress.
- Prepare the new pot by ensuring it has drainage holes and filling the bottom third with moistened potting mix.
- After repotting, adjust the watering schedule and keep the plant in moderate indirect light to help it acclimate.
Preparing to Repot
You may be interested


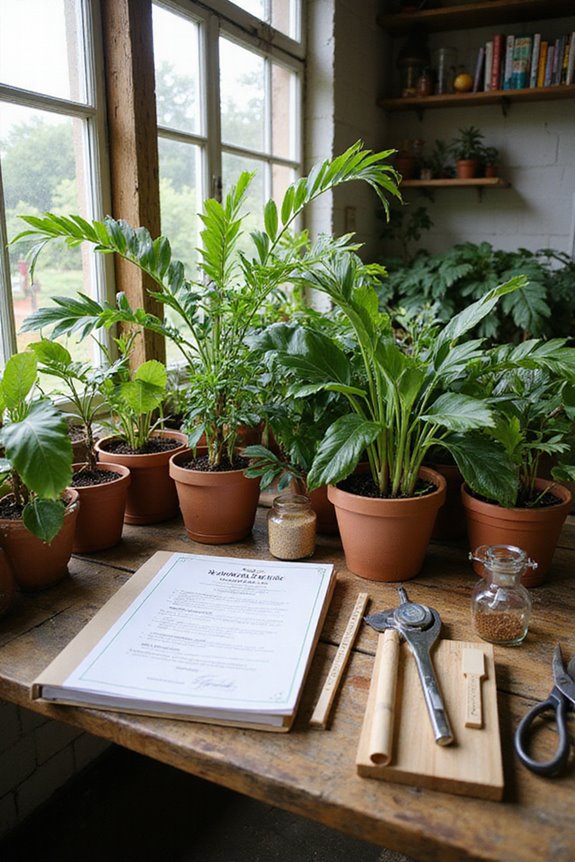
When we prepare to repot our indoor plants, it is important to gather everything we need and understand the steps involved. First, we should choose a new pot that’s 1 to 2 inches wider in diameter than the current one. This allows for growth, especially for plants that need frequent repotting. Next, we need to verify the pot has drainage holes. This helps prevent waterlogging, which is crucial for the health of any plant type.
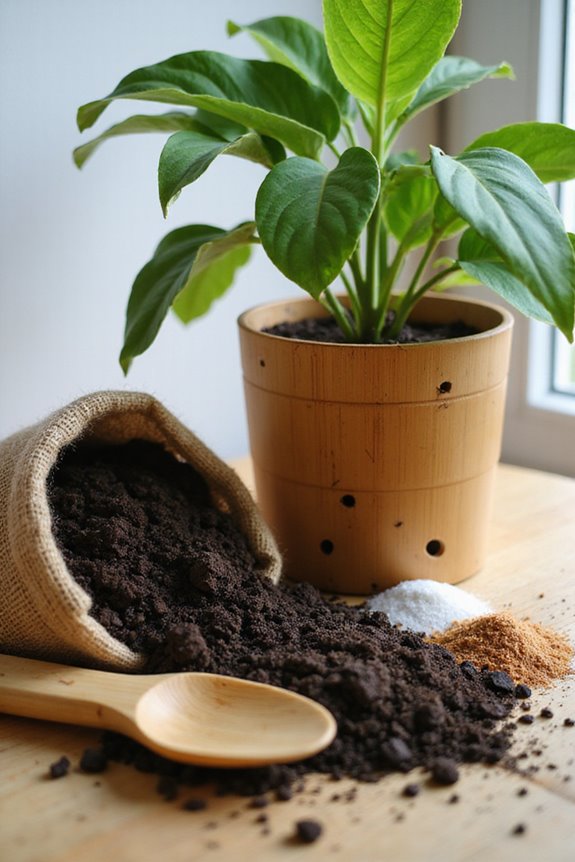
We should also select a high-quality potting mix suited for our specific plants. Remember, it’s important to lightly moisten the mix before use. This guarantees even moisture distribution. Finally, having all supplies ready, including pruning shears and gloves, makes the process smoother.
Recommended Products

✅SIZE: 27" x 27" - Suitable for handling small potted plants or succulents, if you need to handle medium/large potted plants please choose the large or extra large size.

Material: Made of thick high-density PE waterproof fabric, waterproof on both sides for easy cleaning and reusability.

✅Size: 39.5" x 31.5" - Perfect size for counter or tabletop. The most satisfying size for plant lovers.
Removing the Plant From Its Current Pot

Removing a plant from its current pot can be a straightforward process if we follow some key steps. First, we’ll need to loosen the soil around the roots. For plastic pots, we can gently squeeze the sides or use a tool like a butter knife to help slide the plant out. If we’re dealing with ceramic or terracotta pots, a few gentle taps might do the trick.
Next, we should hold the pot in both hands, tipping it to encourage plant extraction. If the plant is rootbound, massaging the pot’s sides can help. Finally, we’ll conduct a root assessment, checking for any circling roots and trimming damaged ones. This guarantees our plant is ready for its new home.
Managing the Roots

Managing the roots of our indoor plants is essential for their health and growth. First, we should inspect the roots for health. Healthy roots are white or light tan; brown or mushy roots may indicate rot. Next, we can identify and remove any dead or damaged roots through root pruning. Using sterilized scissors, we’ll cut off these roots to encourage new growth and prevent disease. We should also gently tease apart any compacted roots to promote better nutrient access. Remember, it’s important not to remove more than one-third of the root mass at once to minimize stress. By taking these steps, we help our plants thrive in their new environment.
Recommended Products

GARDENING ESSENTIAL: With these stainless steel blade gardening shears, pruning tasks like cutting flower stems or maintaining your herb garden are easier with fast and clean cuts

REDUCE HAND STRESS- This scissors was made to eliminate the day to day stress that comes from long time pruning with our soft grip handles, sharp stainless steel blades and springless design to allow free movement

DUAL CUTTING POWER: VERSATILE PRUNING COMBO --- With both Pruning Shears and Pruning Snip, this combo delivers unmatched versatility. Whether you're delicately trimming flowers and shrubs, tackling thicker tree branches, or tending to your vegetable and fruit garden, our combo pack excels in all areas. They're also perfect for landscaping projects and maintaining the health and appearance of indoor plants. With this pack, you have a versatile tool that simplifies your gardening tasks.
Preparing the New Pot and Soil
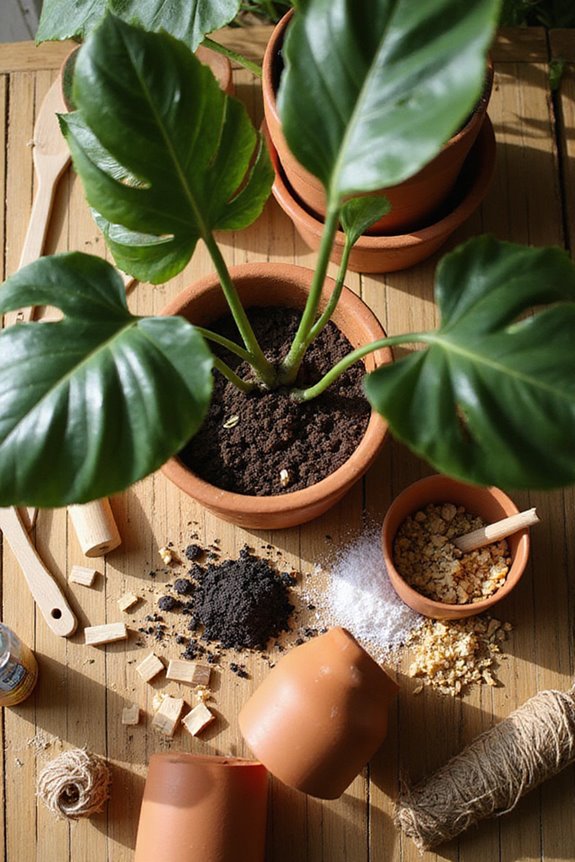
Preparing the new pot and soil is an essential step in making certain our indoor plants thrive after repotting. First, we need to choose a pot size that’s 1 to 2 inches larger in diameter than the current pot. This provides enough room for roots to grow without overwhelming the plant. Next, let’s make sure the new pot has drainage holes to prevent waterlogging.
When it comes to soil texture, we should use a high-quality, well-draining potting mix suited for our specific plant. Before using, we can lightly moisten the mix to help bind the ingredients. Finally, let’s fill the bottom third of the pot with soil, creating a stable base for the root ball. This sets us up for successful repotting.
Recommended Products

【 What You Get 】9pcs 7" plastic plant pots, 9pcs 5" plastic plant pots,9pcs 4" plastic plant pots and 9pcs 3.5" plastic plant pots.

Plant Pots / Flower Pots - Invest in a beautiful garden to harvest the seeds of love, with the set of pots for indoor or outdoor plants

Garden Planting Container: 20 Pack flower pots, including 5 pieces each of 4 inch;5 inch;6 inch and 7 inch clear nursery pots. These pots accommodate different plants, from small succulents to medium-sized foliage, catering to diverse gardening needs
Placing the Plant in the New Pot

Placing the plant in the new pot is an essential step in ensuring its successful changeover. We should position the plant in the center, ensuring it’s straight and upright. It’s important to maintain the soil depth at the same level as the previous pot, avoiding burying the crown. This helps prevent issues like stem rot.
Next, we can gradually add fresh potting mix around the roots, ensuring even spacing for proper plant alignment. We need to avoid packing the soil too tightly, which can hinder root breathing. Finally, let’s check that the plant is stable and upright, with the soil level even. This sets our plant up for a smooth change and healthy growth.
Aftercare Following Repotting
After repotting, it’s essential that we provide the right aftercare to help our plants adjust. First, we need to modify our watering schedule. Newly repotted plants often retain moisture longer, so we should check the soil moisture before watering. For moisture-loving plants, we can resume watering immediately. However, for succulents or cacti, let’s wait a few days to allow root healing. Additionally, ensuring ideal soil health will support our plants as they acclimate to their new environment.
Next, we should consider light adjustments. Keeping the plant in its usual spot helps maintain stable conditions. However, we must avoid direct sunlight right after repotting to prevent stress. Moderate indirect light will support our plants during this adjustment. By following these guidelines, we can promote a smoother recovery for our indoor plants.
Recommended Products

Kindly NOTE: This soil tester can not be applied to test pH value of any other liquid. If the soil is too dry the indicator will not move, and water it before testing.

【4 in 1 function】This is a 4-in-1 multifunctional soil tester.Our soil tester fastly to measure soil moisture, pH, temperature and sunlight to help you take better care of flowers and plants.You can know when you need to water your soil by measuring moisture and pH & Temperature value of the soil and sunlight level of plants with it.

Accurate Soil Moisture Detection: The XLUX Soil Moisture Meter can tell you if the soil deep inside your pot or garden is dry, moist or wet; whereas your eyes and fingers can only determine the moisture level of the soil surface. The probe is 5.5 inches (14 cm) longer than regular styles, allowing it to measure the soil moisture at the bottom of larger and deeper flower pots.
Choosing the Right Potting Mix
Choosing the right potting mix is key for the health of our indoor plants. A good potting mix is typically soilless, using materials like peat moss, coco coir, perlite, or vermiculite. These components improve aeration and drainage, which helps prevent root rot.
- Select Based on Plant Type:
- For succulents, use a mix with sand and perlite for fast drainage.
- African violets benefit from a mix designed for moisture retention.
- We can add amendments like pumice or pine bark for specific needs.
Recommended Products

All-In-One Potting Soil Solution: TOYPOPOR potting soil is a blend designed to give your plants everything they need to thrive. This organic potting soil is packed with perlite, sphagnum peat moss, coco coir and rice husk charcoal. Great for all indoor outdoor plants.
Miracle-Gro Indoor Potting Mix for All Plants feeds houseplants for up to 6 months and grows healthier, more resilient plants (vs unfed when used as directed)

HELPS REGULATE SOIL MOISTURE: Miracle-Gro Organic Indoor Potting Soil Mix is an organic potting soil that protects indoor plants against over and under watering
Signs That Your Plant Needs Repotting
Recognizing when our plants need repotting is essential for their overall health. Here are some signs to watch for:
- Overgrown Roots: If we see roots coming out of the drainage holes or circling the pot, our plant may be root-bound.
- Nutrient Depletion: Slow growth, small leaves, or a crusty topsoil can indicate that our plants aren’t getting enough nutrients.
- Plant Stability: If our plant looks too big for its pot or frequently falls over, it may need more space to grow.
- Visual Inspection: Regularly check for signs like soil pulling away from the pot or the need for more frequent watering.
Tips for Successful Repotting
Successful repotting can make a big difference in our plants’ health and growth. Here are some tips to guarantee our success:
- Choose the Right Pot: Select a pot that’s 1-2 inches larger in diameter. Make sure it has drainage holes to prevent waterlogging.
- Prepare the Roots: Gently remove the plant from its old pot, using repotting tools like a trowel or gloves. Prune any dead or excessively long roots.
- Add Fresh Soil: Use high-quality potting mix designed for our plant types. Moisten it lightly before adding.
- Water and Care: Water thoroughly after repotting and keep the plant in indirect light for a few weeks. Monitor for any signs of stress.
Following these steps helps our plants thrive!
Frequently Asked Questions
How Often Should I Repot My Indoor Plants?
When considering repotting frequency, we should focus on our plants’ growth. Fast-growing varieties may need annual repotting, while slower ones can wait two to three years. Let’s keep an eye on their needs together!
Can I Repot During Winter Months?
Like a cozy blanket wraps us in comfort, winter repotting can be a gentle embrace for our plants during dormancy. It’s a perfect time to refresh their homes, nurturing new growth for the seasons ahead.
What Size Pot Should I Choose for Repotting?
When choosing a pot size for repotting, let’s consider pot material and aim for a snug fit. A well-sized pot promotes root health and helps us nurture our plants effectively together.
Should I Water My Plant Immediately After Repotting?
After repotting, we should definitely water our plant thoroughly. We need to evaluate soil moisture levels, ensuring it’s well-draining. Using proper watering techniques helps our plant settle into its new home comfortably.
What Is the Best Time of Year to Repot?
As spring whispers its arrival, we feel the urge to refresh our green companions. Embracing seasonal changes, we’ll find that late winter to early spring is the perfect time for repotting, fostering vibrant spring growth together.